Types of camera
& how your camera works
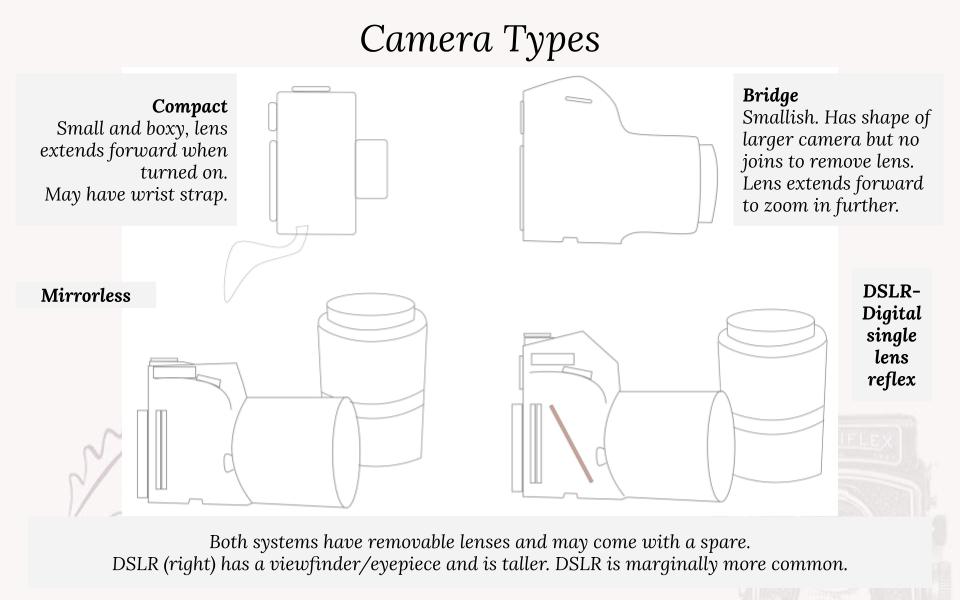
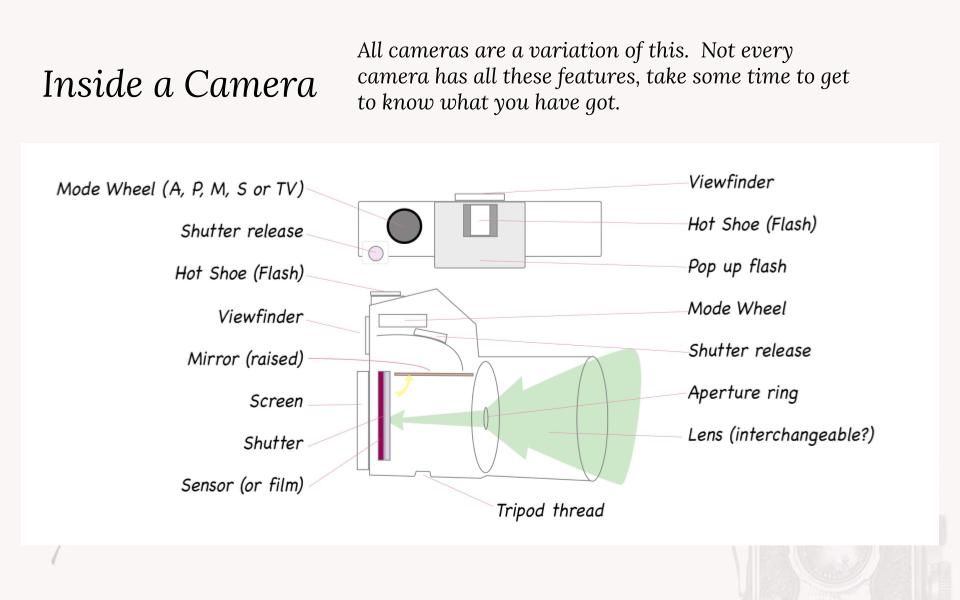
If you are unsure, take some time to work out what style of camera you are using. This is especially relevant when talking about focal length and other settings.
If you are working in a group it is likely some your classmates will use a different type of camera to you so this exercise can help explain any differences you notice in future.
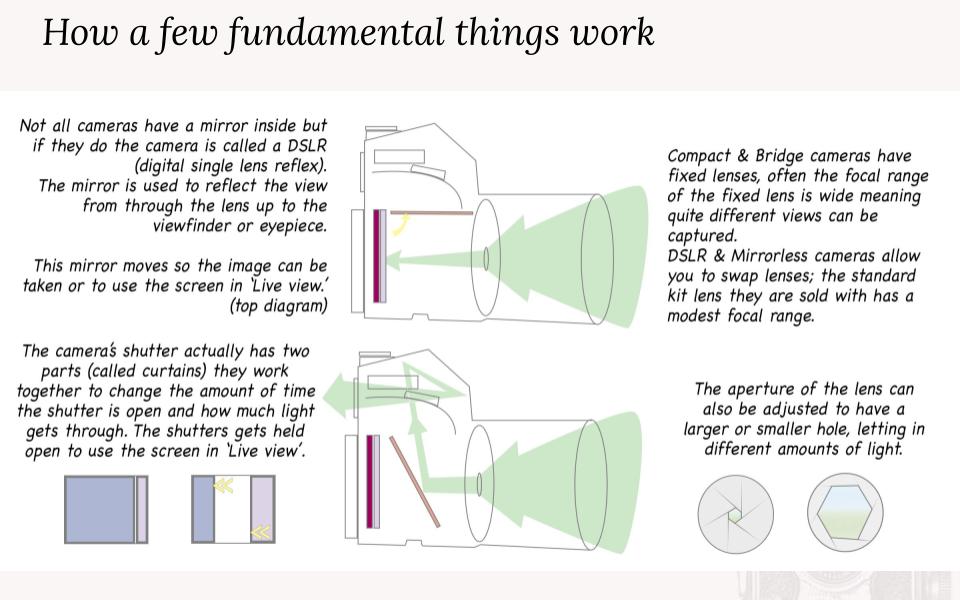
The diagrams also show what happens when we take a photo- it is not essential that you know this- but it may be of interest to some of you, and again helps give a good background to the other settings that will be endlessly discussed and played with.
If you are working in a group it is likely some your classmates will use a different type of camera to you so this exercise can help explain any differences you notice in future.
The diagrams also show what happens when we take a photo- it is not essential that you know this- but it may be of interest to some of you, and again helps give a good background to the other settings that will be endlessly discussed and played with.
A note about holding the camera
Much of this will come naturally but if you are brand new to photography these pointers might help you set up good habits.
- Keep the weight of the camera in your left hand (this frees up your right hand to move to different features and helps you stay steady)
- On a larger camera grip the area underneath where the lens joins the body, this helps balance the weight. If you need to adjust something on the lens your left hand can do that.
- When not adjusting settings keep your right hand poised ready to hit the shutter release and take a shot.
