Aperture
One of the first settings to learn to control for yourself, changing aperture has some really useful effects. It's also worth polishing up on this if some aspects are still unclear as, alongside shutter speed, this is a main pillar of photography.
There is a long list of possible apertures you can set your camera to, you will come to recognise some of these figures in time, for now its only necessary to understand the overall principle and the relationship between the choices.
Let's cover some basics: what it means, how the setting looks on your camera and why you might particularly need to change it. We will also describe the other contributing factors to give you the best chance to display the
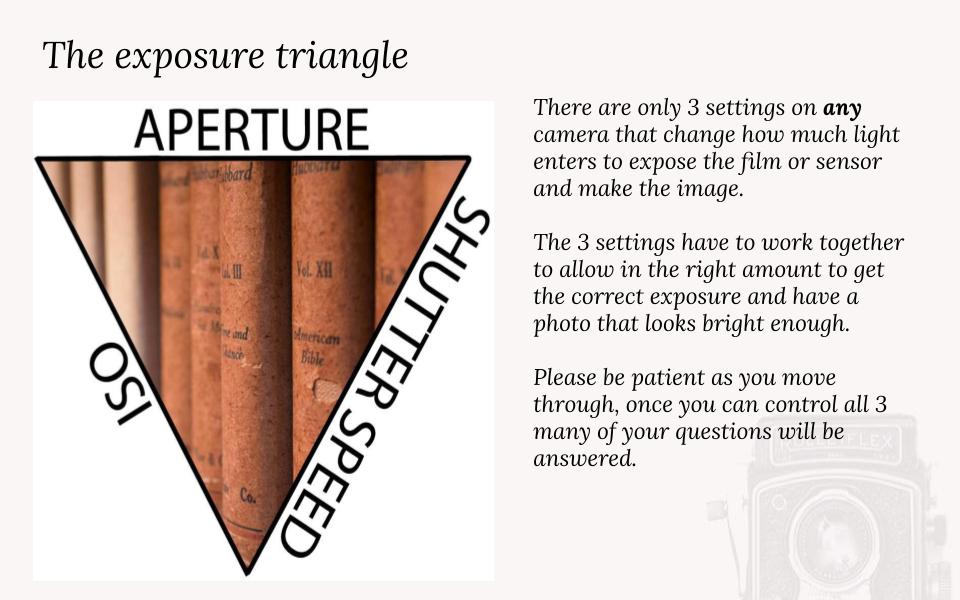
Aperture is one of the things that control exposure:
What is Aperture? |
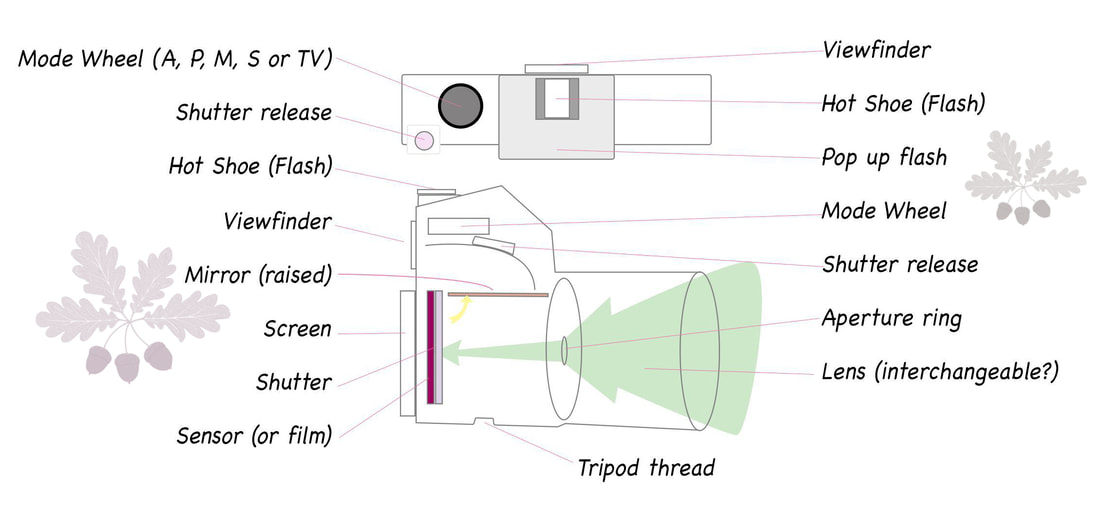
In photography, APERTURE is a the term used to discuss the size of the hole in the lens. |
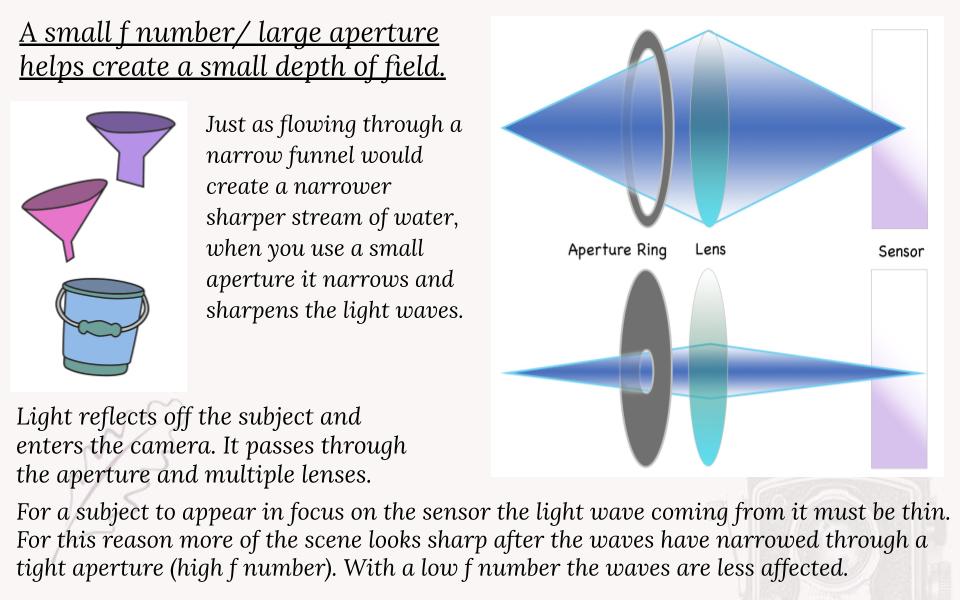
All cameras are a variation of this diagram, you will see the aperture ring is inside the lens.
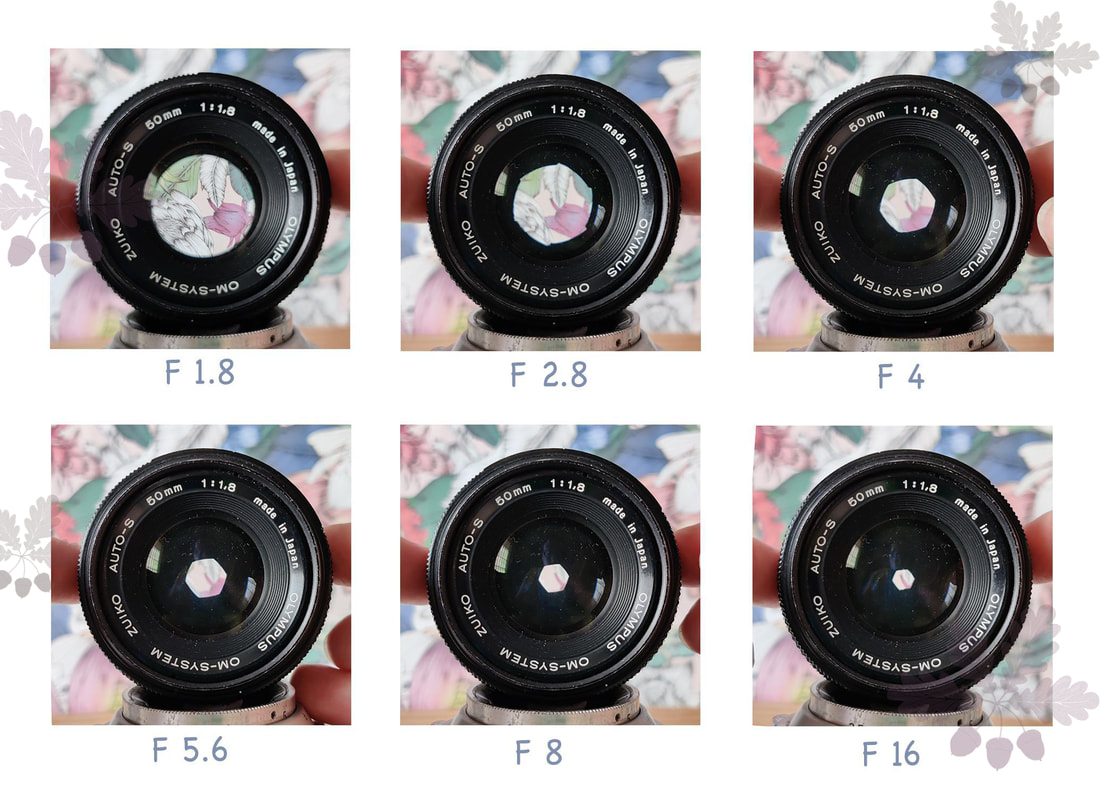
Aperture is measured in F Stops |
The F number is actually part of a ratio that measures the size of the hole in the lens.
It is similar to shutter speed then in that when the main number you read (in shutter speed the bottom half of the fraction) goes up, you will let less light into the camera.
This can be tricky to get your head around but don’t forget that for the most part the camera continues to control & correct how much light gets into the camera, so you don’t need to worry about this day to day.
This can be tricky to get your head around but don’t forget that for the most part the camera continues to control & correct how much light gets into the camera, so you don’t need to worry about this day to day.
Over the long term it is helpful to try and memorise these relationships
i.e. higher F no = smaller hole = less light enters via that hole.
i.e. higher F no = smaller hole = less light enters via that hole.
Aperture priority mode
This is a semi- automatic mode, a great choice because you can control the aperture yourself but the camera balances the other settings to give you a correctly exposed image.
In aperture priority mode (setting A or AV) the camera will control the shutter speed for you to get enough light in.
If possible have the camera also control the ISO by leaving that on Auto ISO (you can learn about ISO here).
Each camera has a limited number of aperture, shutter speed and ISO settings, meaning it is not always possible for the camera to compensate for the choice you have made and get the exposure perfect. This is especially likely when you are selecting a setting from either extreme end of the scale or in very bright or very dark conditions.
Have a look at what f numbers you have on your camera:
Many compact and Bridge cameras have only two or three choices, often from f4 to f8.
It is common that the lowest f number you can get is f3.5.
F stop options are determined by the lens itself, so if you have different lenses you may be able to get to different f numbers.
Many compact and Bridge cameras have only two or three choices, often from f4 to f8.
It is common that the lowest f number you can get is f3.5.
F stop options are determined by the lens itself, so if you have different lenses you may be able to get to different f numbers.
Why choose to change the aperture?
Aside from helping control how much light enters the camera you may choose aperture priority mode to adjust the f number for a visual / creative reason...
...to adjust DEPTH of FIELD!
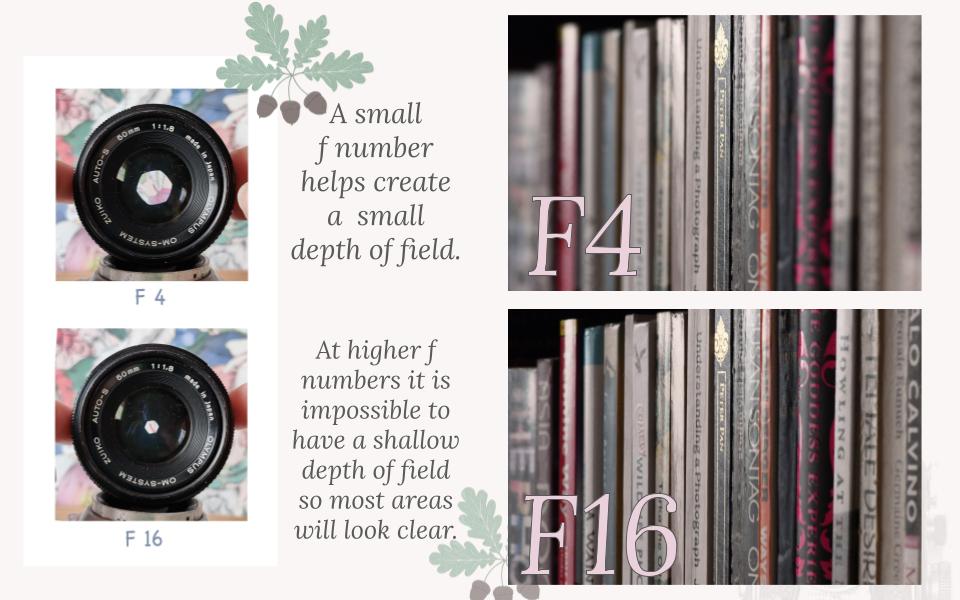
Depth of field refers to how much of the image is sharply focused.
Digital cameras have many possible shutter speeds but among the options on your camera you will see these choices. This list below shows the old fashioned 'stops' you get on film cameras.
This is a simple guide to give you an overview of the relationship between movement and speed.
Its important to remember that as well as particularly fast and slow speeds (both covered in detail below) you can use a mid range shutter speed 90% of the time with no problems.
Sometimes I get so caught up in teaching the more dramatic uses of a setting I give the impression it is only for those situations, not true, a speed of 1/125 or 1/250 is a standard setting that can be used for nearly any subject.
|
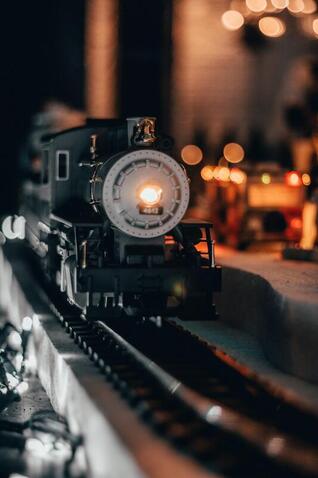
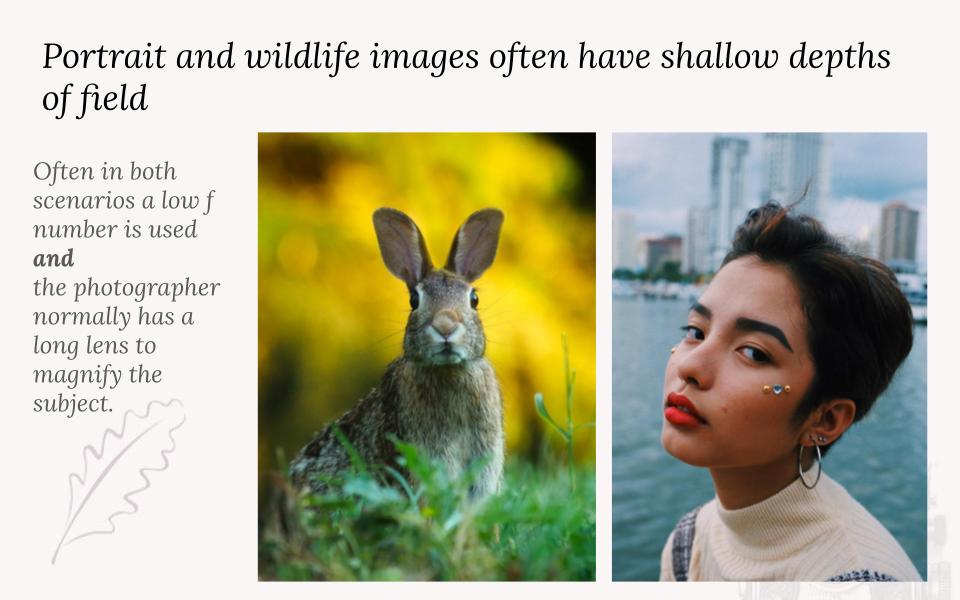
Shallow depth of field
|
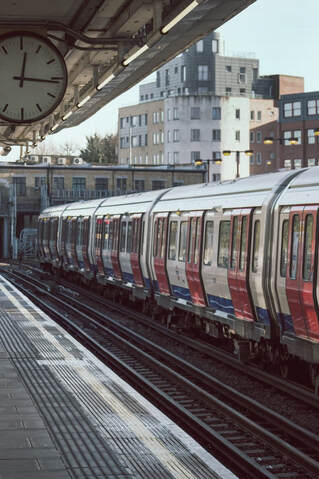
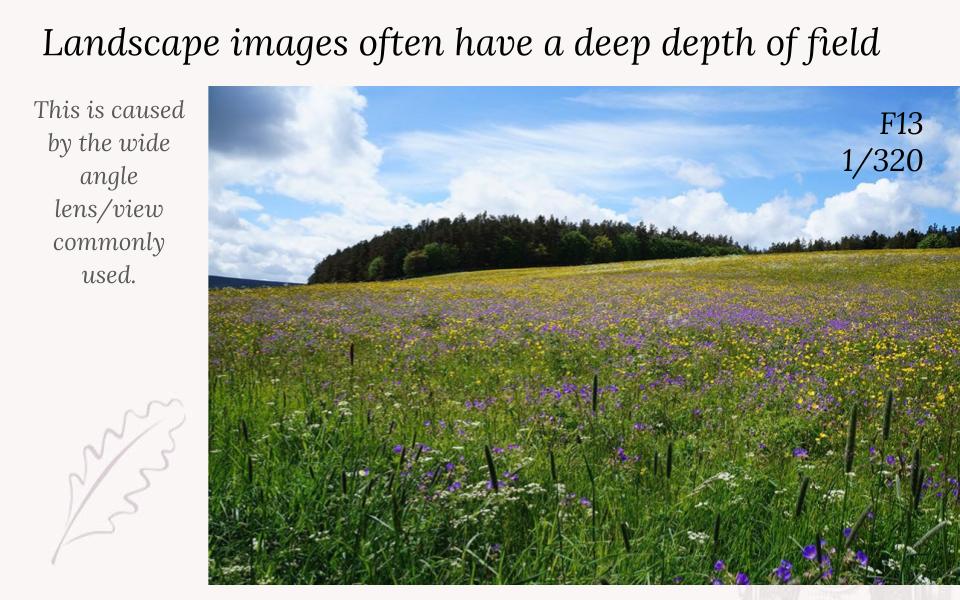
Deep depth of field
|
Aperture & Depth of Field
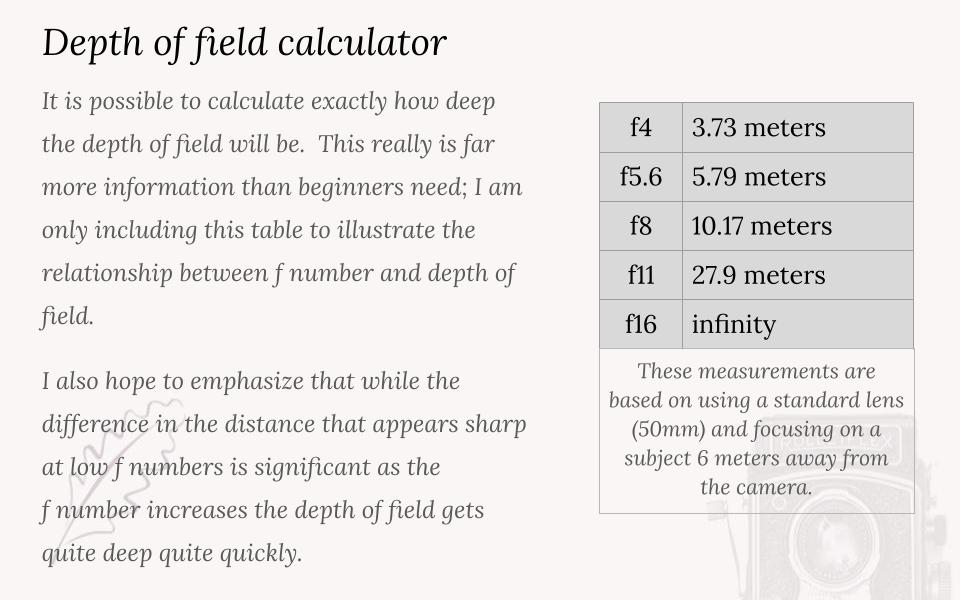
At this point its worth a sentence to mange your expectations. The relationship between f number and depth of field is not linear, unfortunately depth of field does not shrink in a nice neat way as we increase the f number. In contrast when exploring the effect shutter speed has on movement it is quite easy to see the difference changing steadily.
There are other factors at play which we will take a look at in order to give you all the tools you will need to capture your subject with a shallow depth of field and nice blurry background.
There are other factors at play which we will take a look at in order to give you all the tools you will need to capture your subject with a shallow depth of field and nice blurry background.
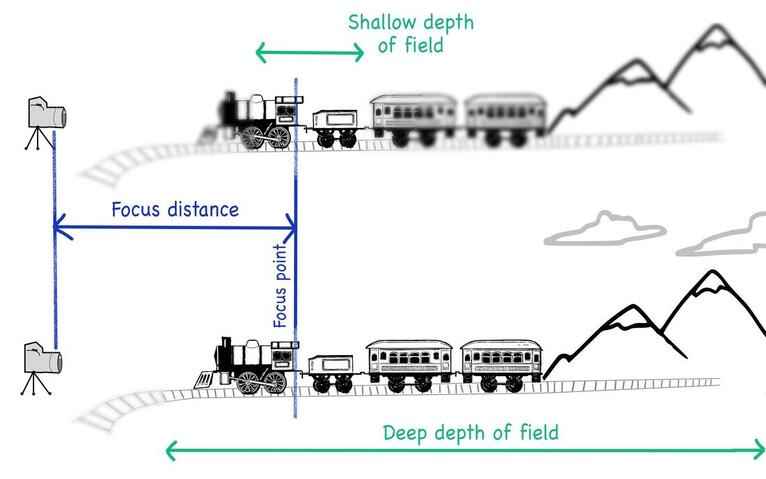
This diagram and analogy proves I should not become a physicist anytime soon but if you like to know why you need to choose a wide aperture/ low f number to allow blurred/ out of focus areas on the image it gives you a brief idea:
Measurements matter!
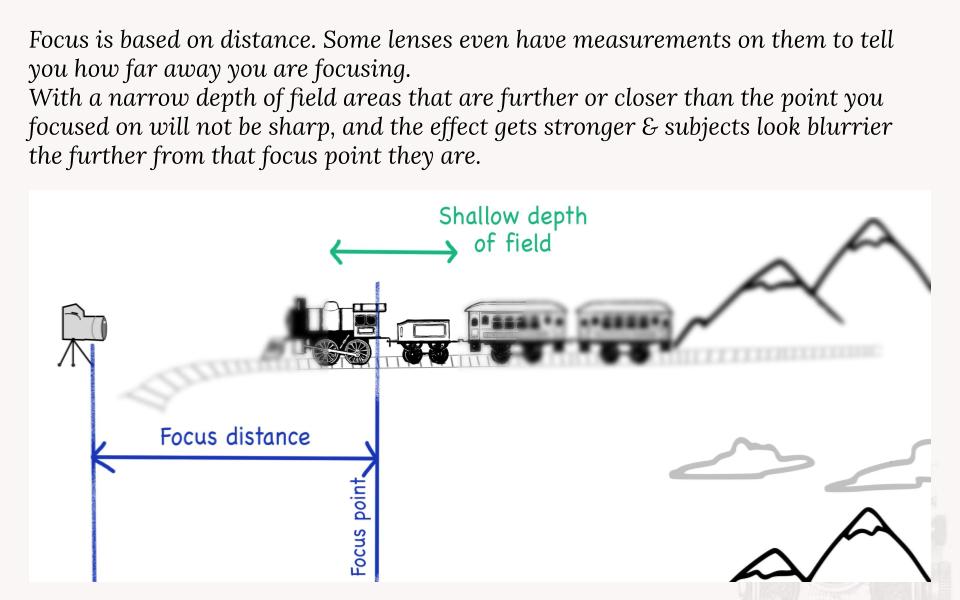
Getting focus right is a big deal, there are different options on your camera and some tips that can help you~ all this is covered separately here. Meanwhile we will assume you can get the main part of your image in focus when you want to...
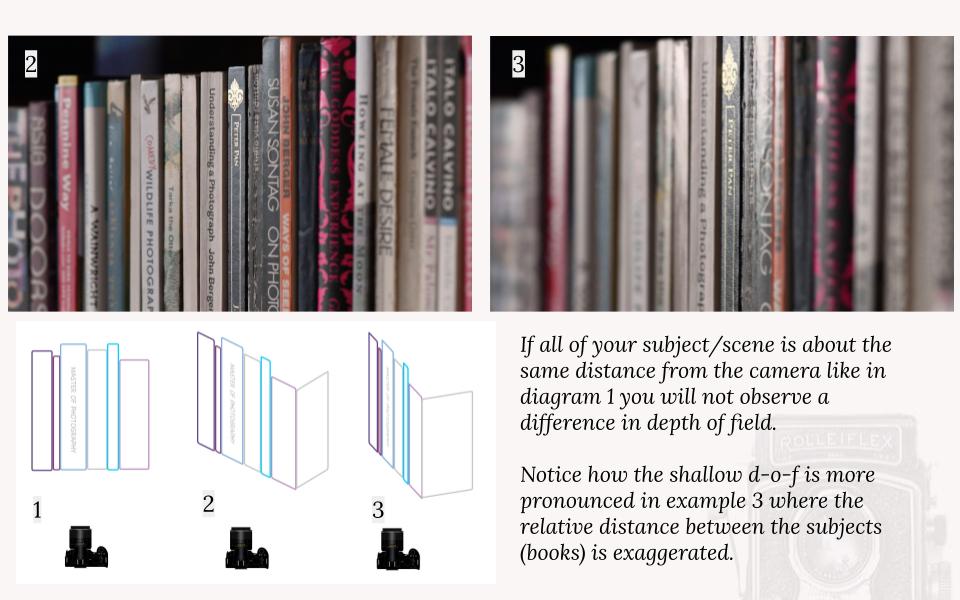
The point made in the above diagram is important. It is really common for people to set their camera correctly but photograph an unsuitable subject and end up very frustrated that their images show no difference in depth of field. You must have a distinctive part of the scene in focus then include noticeable areas closer to the camera and/or further away.
If your subject/scene has plain areas- empty spaces, painted walls, clear textureless surfaces- you will not be able to tell those areas are in focus or not.
If your subject/scene has plain areas- empty spaces, painted walls, clear textureless surfaces- you will not be able to tell those areas are in focus or not.
Hints to get a shallow depth of field...
|
Some circumstances really lend themselves to getting a shallow depth of field.
In macro photographs of close up subjects there is always a lot of the image blurred. Notice in these examples not even the whole of the animal is in focus. If you replicate a similar situation you will get a shallow depth of field:
|
Exercise to create a shallow depth of field
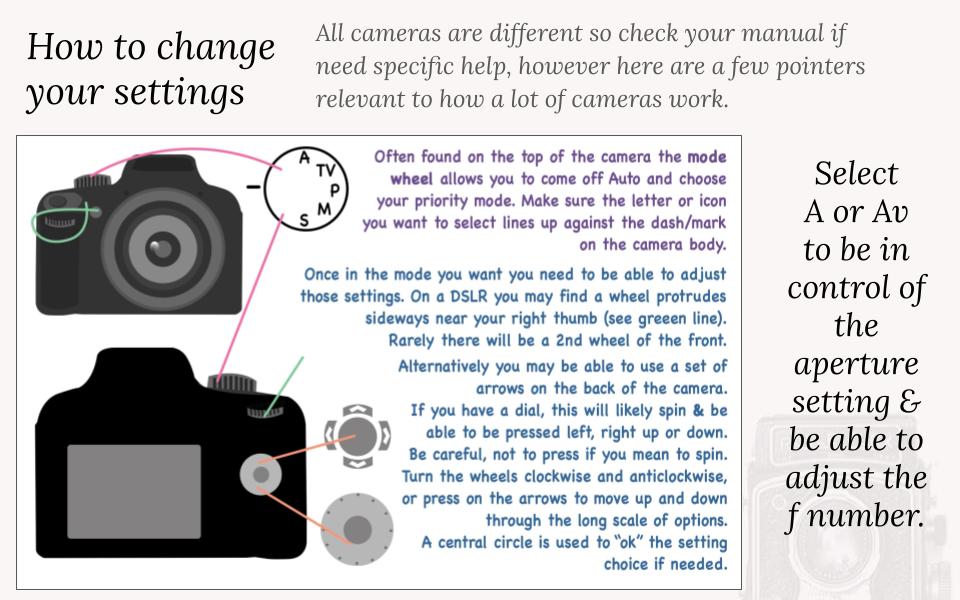
Select Aperture priority mode on the camera (A or AV)
Turn to the lowest possible f number
If possible turn or extend your lens to zoom in, magnifying what you see
Find a detailed subject and look across it, from near to far
Point the camera one third along the length of the subject to encourage the camera to focus there before taking the picture
Why not compare these images to some taken in the same situation with a higher f number? Sometimes the change in focus is only subtle but that still counts! Make sure there is some detail in the subject, such as letters- otherwise you may not tell if it is sharp or not.
How to request a shallow depth of field in Automatic Mode: |
This is not a sure thing as this setting varies between cameras and phones. However it's worth noting that "Portrait" mode is often designed to replicate the look of a shallow depth of field. |
|
Get inspiration for shallow depth of field subjects.
Visit my Pinterest board: https://www.pinterest.co.uk/christinew5001/shallow-depth-of-field/ |
Get inspiration for deep depth of field subjects.
Visit my Pinterest board: https://www.pinterest.co.uk/christinew5001/deep-depth-of-field/ |
Deep depth of field
Exercise to create a deep depth of field
Select Aperture priority mode on the camera (A or AV)
Select a high(ish) f number
F16 is as high an F number as you will need to maximise your deep depth of field-
using a higher number won’t deepen the distance any further
(& has some subtle disadvantages).
Avoid zooming in too much, keep your view wide
(the way the camera normally is set when you turn it on).
Point the camera one third of the distance into the scene to encourage the camera
to focus there before taking the picture
High F numbers means the camera lens aperture is not open wide, never forget that (besides possibly deepening depth of field) the main effect this has is to only let a fraction of the ambient light in.
SO… to use very high f stops in dull light can be difficult. You are likely to get an underexposed (very black or dark) image. To avoid this the camera will choose a slow shutter speed for you, but this makes camera shake and unwanted movement in your shots more probable.
Using Auto ISO can help avoid this (see ISO here) but for now if you have problems you can always try a lower f number.
How to request a deep depth of field in Automatic Mode: |
The landscape setting often replicates a wide depth of field. Although in all honesty a fairly deep depth of field is the norm and you are unlikely to struggle seeing this. |
Aperture - some final points
A repeated warning about depth of field...
There are actually a few factors in photography that affect depth of field.
While a low f number helps enhance a shallow depth of field this doesn't mean every photo taken with a low f number will only be partially in focus.
Nor is it true that whenever you need more in focus raising the f number will necessarily be sufficient.
The relationship between shutter speed & movement is neat and constant, we can test it out and show that the amount of movement reduces steadily as you raise the speed. Unfortunately the difference f number makes to depth of field isn’t as linear or tidy.
I mention all this because it is crucial you know that it is not always possible to see a shallow depth of field, this is a fact of the physics & you are more than likely not doing anything wrong.
So which aperture should you use? |
F 8 |
It is absolutely fine to leave your camera on shutter speed mode all of the time, simply select a midrange speed such as F8, this works for most things.
Consider changing the aperture when focus and a wide or shallow depth of field is important to your image.
Consider changing the aperture when focus and a wide or shallow depth of field is important to your image.
NEXT:
