How to create an artistic interpretation of your subject
This quick tutorial is designed for use in Photoshop CC but may be adapted to work in PS Elements or Affinity Photo.
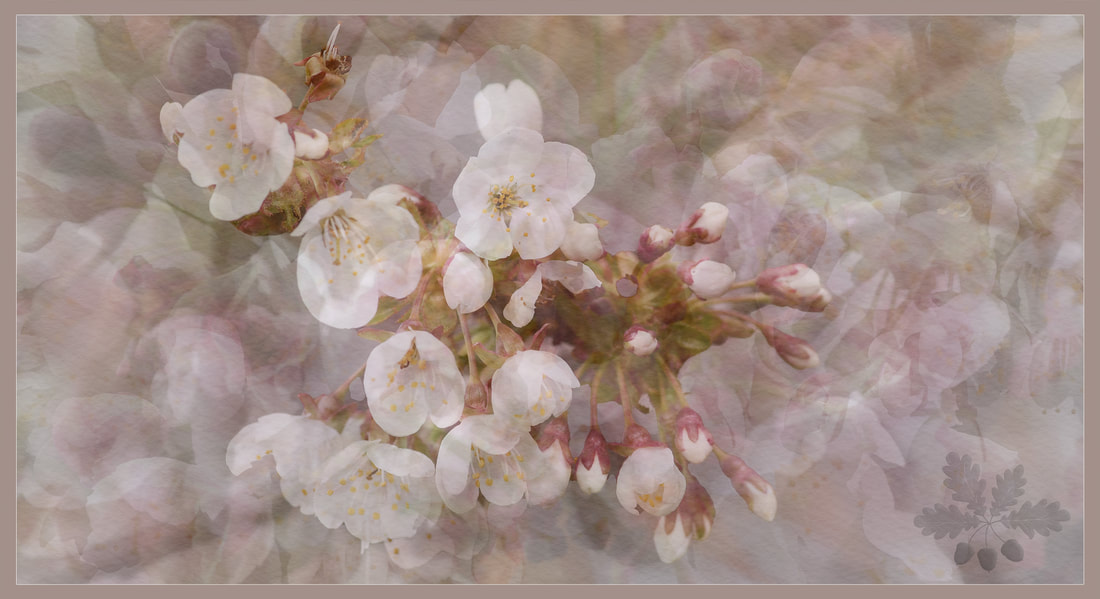
This technique requires a number of photos to work, thematically it can be good to keep the subject matter related. I chose about 9 shots of blossom for the above scene but selected different compositions to visually vary the contents. If your computer sometimes struggles with 'heavy' tasks you could lighten the load by reducing the size of the images (use a copy of each) first.
1. Locate the images within your files that you would like to use, it may be easiest if they are in the same folder. Open Photoshop.
2. Use File>Scripts>Load files into Stack. In the pop up dialogue box press Browse and navigate to the folder of images, select each one you wish to use by holding the control or command key. Click Open. You have the chance here to delete any unwanted images from the list or browse again to add more. Once happy click OK.
3. The images will each be open as a separate layer in your document. If you do not see the layers panel use Window> Layer. Highlight all the layers at once and right click on one of them, choosing Duplicate Layers. Hit Ok on the pop up box. While the copied layers are still highlighted right click again and use Group from layers, again Hit Ok on the pop up box. in the layers panel click on the eye symbol to the right of the Group Folder, this will not appear to make any difference yet but is important so you can see the effect of the next step.
4. Return to the original list of photos/layers, highlight them all (be sure not to include the new Group) and right click on one of them, choose 'Convert to Smart Object' the computer may need to think about this then you should be left with what looks like only one layer.
5. With the new Smart Objet layer highlighted/active in the layers panel. Visit Layer>Smart Objects> Stack Mode> then choose an option from the menu. I used either Median or Mode.
6. Return to the Group of images, this should be above the Smart Object layer in the layers panel but if not just click and drag the Group Folder so it sits along the top row. Click on the simple arrow to the left of the Group icon and it will drop open to reveal the layers inside. Click once more on the eye icon by the Group to make these visible again. Hold down the alt or option key while clicking on the eye symbol alongside each layer in turn, this is to give you a chance to see each layer in turn and select whichever you think has the strongest composition to be the most noticeable part of your final image. Make your choice.
7. Turn the Smart Object, bottom layer visible again by clicking on the eye alongside it (you won't see this make a difference just yet).
8. Click directly on the text along the layer (normally the file name) of your chosen image from the Group. Then at the top of the layers panel select a different bending mode by clicking where it currently says Normal, options include Soft Light, Overlay and Screen. Choose any mode you like the look of. You may enjoy adjusting the Opacity slider too (also at the top of the layers panel).
This should be enough to create an unusual, atmospheric image.
Some more advanced tweaks I added were:
- adjusting the curves of the layers using adjustment layers.
- adding a layer mask to the top layer and partially obscuring the background to allow the central subject to be more dominant.
- adding an additional texture layer of watercolour paper above all other layers.
- adding a watermark using a personalised brush which was then bevelled.
- adding 2 borders, one using a duplicate layer and average blur, the thin white line is layer effect 'stroke'.
I regret not being able to explain each of these extra steps here but I am happy to answer any questions about them. I am also interested to see your results and talk about any ways your personalised your version. Get in touch!
